Printer Setup using print server
box
Printing to non-default printer
Start/Stop/Restart Print Service
(LPD)
Various System Status Programs
Create User Accounts via command
line
Change Gnome Terminal to Other user
account
Partial Backup (By directory Name)
“Page Not Found” on file uploads
via php scripts
Known Differences between gcc and
cc code
Compiling code that uses #include
<asm/io.h>
Compiling code that uses math.h
library
Getting IO Port Programs to run
under user accounts
Linux
- Current system installation is RedHat 7.2 with the SERVER Option.
- Zip drive had to be unplugged or a “HDB: interrupt Lost” error would occur
- Static IP of 192.168.0.50
- Services added since installation (see ‘Turn on Services’ below)
- httpd
- sshd
- lpd is shut down until I can figure out how to prevent remote users from printing (see ‘Printer Setup using print server box’)
Linux Install (Redhat 7.2)
{This is how MY machine is configured. It might not work the same way for you}
Boot from CD
|
At prompt |
Response |
|
BOOT: |
<ret> |
|
ENGLISH |
<NEXT> |
|
Model | layout | Deadkeys |
<NEXT> |
|
Mouse |
2 button PS/2 <Next> |
|
Welcome |
<NEXT> |
|
Installation Type |
Server <NEXT> |
|
Partition |
Auto <NEXT> |
|
Auto Partition |
<Next> |
|
Warning |
<NEXT> |
|
Disk Setup |
<Next> |
|
Boot Loader |
LILO <NEXT> |
|
Firewall |
Allow Incoming: SSH, WWW, FTP <NEXT> |
|
Language Support |
<NEXT> |
|
Time Zone |
Select Chicago (Central) <NEXT> |
|
Root password |
Type in password two times <next> |
|
Packages |
Default AND: GNOME WEB SQL <NEXT> |
|
Video Card |
<Next> |
|
About to Install |
<next> |
|
Long Wait |
|
|
Create Boot disk |
Skip <Next> |
|
Monitor |
<next> |
|
Graphics Config |
1024x768 True Color <Test> <exit> |
On first boot it will “FIND NEW HARDWARE” set up the Ethernet connection but ignore the sound card.
Be aware when it continues that when it hits eth0 it will take a while (making you think it locked up)……DO NOT reboot the machine, wait it out.
When the computer comes up, log in and go to the Service Configuration program and turn on HTTPD and turn off LPD.
Shutdown
shutdown –h now
Turn on Services
To turn on a service (ie httpd) use the following program in Gnome:
Programs | System | Service Configuration
Login Log
/var/log/secure
To show the last login for each user (this is a program not a text log):
/var/log/lastlog
File Search Tool
Use the following program in Gnome:
Programs | utilities | Gnome Search tool
File Size
To put output of ll, ls, df, du in human readable form, use the –h flag.
EG:
-h, --human-readable
print sizes in human readable format (e.g., 1K 234M 2G)
Directory Size
Use the following command to obtain the size of a directory or group of directories:
du –hc dir
the –h puts the output in human readable format (see above) and the –c gives you a total (useful if you want the total of a tree)
Disk Usage/Free Space
Use the following command to obtain the usage of all mounted disks:
df -h
File Search Using locate
To set up locate first do a: locate –u (this sets up the index file)
Then to search do: locate search_string
Screen Capture Tool
Use the following program in Gnome:
Applets | utilities | screen shooter
Printer Setup using print server box
To set up printer, use the following Gnome program:
Programs | system | Printer Configuration
|
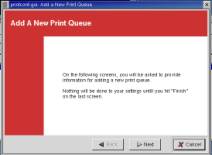
1) Opening screen |
|
Hit next |
|
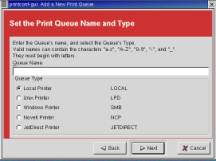
2) Setup the print Queue name and type |
|
For Queue Name I used SOL-HP500C SOL-HP1120C For Queue Type use unix Printer |
|
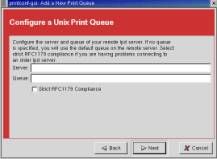
3) Configure a Unix Print Queue |
|
For Server use the current printer IP as defined by the DHCP server For Queue use: lpt1 lpt2 as per SOL print server connections |
|
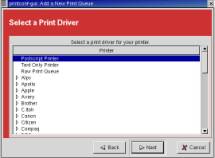
4) Select a Print Driver |
|
Self explanatory |
|
5) Finish |
|
Shows the configuration as set. |
|
||
Two known problems with this setup procedure:
- In step 3, the IP changes when the print server resets and requests and IP from the DHCP so this configuration will need to be updated when that occurs.
- This allows all users to print, including remote users. I know that /etc/lpd.perms needs to be configured so that only requests from the local (192.168.*.*) will print all other requests are rejected, but so far every time I tried to modify the file it will not allow any print job.
Printing to non-default printer
lp –d printer_name filename
Where printer_name is the name used in step 2 of ‘Printer setup using print server box
Start/Stop/Restart Print Service (LPD)
/etc/init.d/lpd start|stop|restart
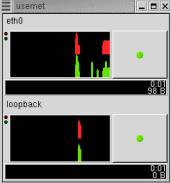
Network Monitor
Use the following program in Gnome:
Programs | internet | RH Network Monitor
|
Will give you a window like this: Eth0 -> Ethernet card Loopback -> 127.0.0.1 Red (Top graph) -> Transmit Green (Bottom graph) -> Receive |
|
Package Manager
Use the following program in Gnome:
Programs | System | GnoRPM
Similar to windows “Add Programs”
IP Lookup tools
dig <ip-address>
host <ip-address>
Compare Files
Use the diff command:
diff [options] from-file to-file
Current Path
Pwd
Change File Time
Use the “touch” command to change the file modify time by using:
Touch –w –t [CC]YYMMDDhh[.ss] [optional]
Various System Status Programs
ps –aux
top [^C to end]
Fixing Ownership and Groups
When transferring files to user accounts when logged in as root, the file will be owned by root and in the root group. To change it to allow the user to modify these files type:
chown –R ownername *; chgrp –R groupname *
NOTE: the –R means that all files in the current directory and ALL SUB DIRECTORIES will be changed to the new owner and group
Create User Accounts via command line
To create a user account from a shell prompt:
1. At the shell prompt, log in as root.
2. Type useradd followed by a space and the username for the new account at the command line and press [Enter].
3. Now type passwd followed by a space and the username again.
4. The shell prompt should display New UNIX password. This is asking you to type the password for the new account.
5. Type the password again for confirmation.
[above from: http://www.redhat.com/docs/manuals/linux/RHL-7.1-Manual/getting-started-guide/s1-creating-account.html ]
Passwords
To give a user ROOT permissions:
Open the file /etc/passwd
The format of each line is as follows:
Name:Password: UserID(UID):PrincipleGroup(GID):Gecos:
HomeDirectory:Shell
Change the uid and gid of the user to 0
Disable Password Aging
passwd –x –1 username
Disabling Root Login
1)
SSH
into your server as 'admin' and gain root access by
su -
2) Copy and paste this line to edit the file
pico -w /etc/ssh/sshd_config
3) Find the line
#Protocol 2, 1
4) Uncomment it and change it to look like
Protocol 2
5) Next, find the line
#PermitRootLogin yes
6)Uncomment it and make it look like
PermitRootLogin no
7) Save the file
ctrl 'x' then 'y' then enter
8) Restart SSH
Above
from: http://forum.ev1servers.net/printthread.php?threadid=18437
Pico w/o word wrap
To turn off pico word wrap start pico with
pico –w
Change Gnome Terminal to Other user account
Use:
su username (default username is root)
(su does not stand for Super User, it stands for Substitute User)
Backing up Server
To backup the server, I created a script that saves the most pertinent directories. The script is as follows:
#!/bin/sh
tar -zcvpf backup-`date '+%d-%B-%Y'`.tar.gz /root /etc /home /var/www
this will create a file named “backup-dd-MONTH-yyyy.tar.gz”. I saved the script as backup.sh
Partial Backup (By directory Name)
Say you wanted to do a backup of /home directory and place all users with the beginning initials a-m in one tar file. Here is how you can do it:
find /home/[a-m]* –type f -print |tar –zcvf filename.tgz –T –
and yes you need the ending – (not sure why).
[a-m] is NOT case sensitive!
Restore Server
To restore using a backup created using the above script, be logged in as root and in the / directory. Use the following command:
tar –xvzf file_name_of_backup(including_full_path)
If you only want to restore a file or directory from the backup use the above line but add the directory or file to restore:
tar –xvzf file_name_of_backup(including_full_path) name_to_restore
eg:
tar –xvzf /usr/backup/backup-05-July-2003.tar.gz home
will restore only the home directory and all sub directories of home (because –v is verbose)
List Files in TAR
tar –ztvf name_of_file
Automatic Backup
To automatically backup the system do the following:
- Create a directory (in my case I put it in /usr/backup because it had the disk space required)
- Create a script file named backup.sh that will remove very old backups and then do the new one. Here is the script I use:
#!/bin/sh
find /usr/backup -name 'backup*.tar.gz' -mtime +28
-exec /bin/rm {} \;
tar -zcpf /usr/backup/backup-`date '+%d-%B-%Y'`.tar.gz /root /etc /home /var/www
- Use crontab –e to create the following file:
0 21 * * 1 sh /usr/backup.sh
This will run the script backup.sh every Monday at 9pm and remove backup files older than 28 days.
Crontab
The following was taken from http://medgen.univr.it/~ciano/download/documentation/crontab.html
Creating
a Crontab
What is Crontab?
Crontab is a program that allows users to
create jobs that will run at a given time. Each individual user has their own
crontab and the entire system has a crontab that can only be modified by those
with root access. If you are adding a crontab for an individual user you must
sign on as that user first. (ex. su userid)
The syntax of this file is very rigid.
There are six fields to a file, each separated by a space. The first five
fields specify exactly when the command is to be run; the sixth field is the
command itself. The first five fields are:
Format
minute hour day month weekday command
Minute - Minutes after the hour (0-59).
Hour - 24-hour format (0-23).
Day - Day of the month (1-31).
Month - Month of the year (1-12).
Weekday - Day of the week. (0-6; the 0 refers to Sunday).
Asterisks (*) specify when commands are
to be run in every instance of the value of the field. For instance, an
asterisk in the Month field would mean that the command should be run every
month. In addition, multiple events can be scheduled within a field by
separating all instances with commas - with no space between.
Options
crontab -e
Edits the current crontab or creates a new one. *
crontab -l
Lists the contents of the crontab file.
crontab -r
Removes the crontab file.
Creating a Crontab for use with
AccessWatch
You must first sign on as the individual user you
are adding the crontab for. Do not create crontab while you are signed on as
"su" under root or you will change the root crontab. After you sign
on as root su as individual user.
su userid (ex su nercols)
Change editor to Joe from VI:
EDITOR=joe
export EDITOR
Create the crontab from the command line:
crontab -e
Insert the following lines and the save
the file (Ctrl-kx):
30 23 * * * /home/userid/www/aw/aw-parser.pl -d
45 23 * * * /home/userid/www/aw/aw-report.pl
AccessWatch will run against the log
files in their home directory every evening at 11:30 and then generate a report
at 11:45 p.m..
Type man crontab for more detailed
information. If you don't want to set up a crontab just run the by hand when
you want a report.
./aw-parser.pl
./aw-report.pl
Adding a Hard Drive
The following was taken from http://aplawrence.com/Linux/adddrive.html
Adding a Linux Hard Drive by Dirk Hart
Email: dhart@mailstarusa.com
More Articles
I was asked to configure a second IDE hard drive for a RedHat 7 Linux system.
I was at a loss as to how to describe this new drive to Linux and after half an hour I realized that the drive had been autodetected at the time of the last boot. A little research showed how IDE drives are named:
Primary Controller First Drive: /dev/hda
Primary Controller Second Drive: /dev/hdb
Secondary Controller First Drive: /dev/hdc
Secondary Controller Second Drive: /dev/hdd
Then fdisk was used to partition the drive: fdisk /dev/hdc. I seleted the old partitions and added a single linux partition, making sure the partition type was 83 (Linux).
When that was done I used mkfs to make a filesystem. Since there was just one partition it was named /dev/hdc1: mkfs /dev/hdc1.
I made a mount point: mkdir /usr0 and mounted the new filesystem: mount /dev/hdc1 /usr0. The filesystem can be unmounted using umount /usr0.
Lastly, I made an entry in /etc/fstab describing the new filesystem so it would be mounted automatically mounted at boot time. This was tested using mount all and observing that the new filesystem was indeed mounted.
I followed the above instructions, but it still failed to work correctly. I found I had to execute the following command:
tune2fs –j /dev/drive
After executing the command, the new drive worked correctly.
Apache Notes
Apache HTML Directory
/var/www/html
Set up user web space
In the configuration file /etc/httpd/conf/httpd.conf
# The path to the end user account 'public_html'
directory must be
# accessible to the webserver userid. This usually means that ~userid
# must have permissions of 711, ~userid/public_html
must have permissions
# of 755, and documents contained therein must be
world-readable.
# Otherwise, the client will only receive a
"403 Forbidden" message.
#
# See also: http://httpd.apache.org/docs/misc/FAQ.html#forbidden
#
<IfModule mod_userdir.c>
UserDir
public_html
</IfModule>
The line UserDir tells what the directory under /~userid/ has to be named for access from the www.
Also note the permissions described in the comments. This is accomplished by:
chmod 711 ~userid
chmod 755 ~userid/public_html
Web Statistics
Web statistics are generated by a program called webalizer.
The configuration file is /etc/webalizer.conf
Incremental mode (/etc/webalizer.conf line 64 was activated)
Password Protecting Websites
(taken from http://www.techtv.com/screensavers/howto/story/0,24330,3405624,00.html)
In the configuration file /etc/httpd/conf/httpd.conf add the following lines
<Directory "/home/*/public_html">
AllowOverride AuthConfig
</Directory>
You must Restart Apache at this time.
Then create a file named .htaccess in the directory to protect (note that all sub directories are also protected).
The file should read:
AuthUserFile
“/path of directory/.htpasswd"
AuthGroupFile /dev/null
AuthName "name to display"
AuthType Basic
require valid-user
Valid-user will allow anyone in
the .htpasswd file (see below) to log in.
Now make the file world readable
by:
chmod ugo+r .htaccess
Finally create the password file by:
htpasswd –c .htpasswd username
note: failed logins can be found in /etc/httpd/logs/error_log
Redirecting
To redirect a webpage, use the following META command. This will redirect in 5 seconds and take the user to html-redirect.html.
<META HTTP-EQUIV="Refresh"
CONTENT="5; URL=html-redirect.html">
Start/Stop/Restart commands
You can start, stop and restart the Apache Web server by using scripts created for this purpose in Red Hat Linux. Type in a shell prompt as root: /etc/rc.d/init.d/httpd start to start the server. To stop or restart use the same script but replacing start with stop or restart. You must start the server as root, in order to run the server in port 80, as defined in httpd.conf.
Above taken from: http://home.ubalt.edu/abento/linux/apache/index.shtml
“Page Not Found” on file uploads via php scripts
Edit the /etc/httpd/conf.d/php.conf file. Modify the LimitRequestBody line (increase the number to the right to the max file size)
C Notes
Known Differences between gcc and cc code
|
Gcc |
Cc |
|
Void main(void) |
main() |
|
|
|
To Run Compiled Code
Type ‘./a.out’
Compiling code that uses #include <asm/io.h>
cc prog.name –O
Compiling code that uses math.h library
To compile code that uses the math.h library use
cc prog.name –lm
it seems you do not need an #include <math.h> statement in the header, but you do need to explicitly declare the function.
So if you want to use the pow function you would think you should do this:
#include <math.h>
#include <stdio.h>
But you need to do this:
#include <stdio.h>
double pow(double x, double y);
[compile with the cc prog.name –lm]
I discovered this when trying to use the pow function. It
kept on generating a “Undefined reference to ‘pow’” error on compile.
Found website http://use.perl.org/~Ovid/journal/10965
that said how to fix it (as described above)
IO Port Programming
See file IO-Port-Programming.txt
Getting IO Port Programs to run under user accounts
chmod +s filename
su
[you will be asked for the root password]
chown root filename
exit
PHP Notes
Ctime
Ctime is not the “file creation time” but the “status change time”
MySQL
Getting Started
To start mysql:
mysql –u username –p
Mysql will then ask for a password (use the password for username)
When you get the prompt type:
show databases;
This will get you a list of current databases.
Refer to: http://www.mysql.com/doc/en/index.html
Backing up MySql
From: http://www.gifart.com/mysql.shtml
BACKING UP:
Create a folder on your server to hold
all of your backup files. For example: home/yoursite/html/backup.
Telnet into your server and move to the
"backup" directory.
Execute the following command
substituting the words in italics with your actual mysql username, password,
and database name:
mysqldump
-uUSERNAME -pPASSWORD DATABASENAME > backup.sql
At this point all of your mysql tables
should be backed up into a file called "backup.sql" within the backup
directory. You can store this file there, FTP it to your home computer, or FTP
it to another server to restore the data there.
RESTORING YOUR DATA :
The only trick with restoring the data is
that if the tables already exist in your mysql database, then the restore will
not work. Thus, you need to delete or rename any tables that exist before the
backup.
From telnet, move into the directory
containing the "backup.sql" file and type:
mysql
-uUSERNAME -pPASSWORD DATABASENAME < backup.sql
This will recreate all of the tables and insert all of the
data. Note that you can use this method to transport the data to a mysql
database on another server.
To dump all databases use:
mysqldump –all-databases > backup.sql