 |
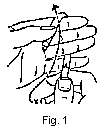
1. place the braid around three fingers of the left hand, palm up (fig 1). The working end of the braid known as "X" and the stationary end as "Y". |
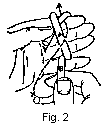 |
2. Bring end x over the stationary end Y (fig 1) and around the back of the hand (fig 2). |
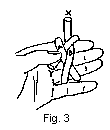 |
3. Thread end x over A and under Y thus forming B (fig 2-3). |
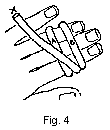 |
4. Turn the hand over, palm down (fig 4). |
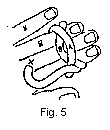 |
5. Loop A over B and B under A (fig 5). Hold in position by placing the forefinger of the left hand between A and B. |
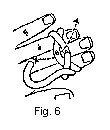 |
6. Thread end X under B through the crisscross loop thus formed by A and B (fig 6). |
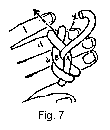 |
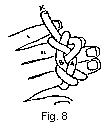
7. Thread end X under B (fig 6) over A and under B again (fig 7-8). |
 |
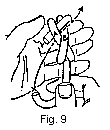
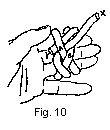
8. Turn the hand over, palm up (fig 9). Bring end X along side of and parallel to end Y by threading the strand under A and over B (fig 9-10). Follow the direction of the dotted arrow. |
 |
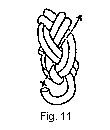
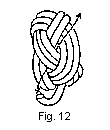
9. The Turk's head neckerchief slide is formed by following this strand Y around three times; i.e., until there are three braided strands parallel to each other all around the slide (figs 10, 11, 12) |
 |
10. The second time around is indicated in fig 11 as well as the beginning of the third time around. Fig 12 indicates end X on the completion of its third time around. |
 |
11. In doing this it may be necessary to take in the slack from time to time in order that there will be a sufficient amount of material to complete the slide. |
 |
12. It is important to adjust the slide so that it will be neat as well as the right size. Then, too, it will be necessary to remove the slide from the fingers when you thread end X around the for second and third time (fig 11-12). |
|
13. The slide ends at the same point at which it was begun (Y). This completes the neckerchief slide. |


